9 Beginner Vermicomposting Mistakes That Quietly Ruin Apartment Worm Bins
A lot of beginner vermicomposting mistakes happen before the worms even touch a banana peel. People grab a random plastic tote, drill a few holes, toss in kitchen scraps, and assume worms will sort it out. They won’t. An apartment bin needs airflow, a stable location, and enough bedding to act like a sponge and a buffer. If the bin starts out too shallow, too wet, or parked beside a hot radiator, you’re basically setting up indoor compost problems and blaming the worms for them later.
Another early apartment worm bin error is starting with the wrong worms or too few of them. Red wigglers are what you want, not random earthworms dug up from outside. Regular garden worms hate bin life. And if you add a tiny handful of worms to a bin that gets daily food scraps from a two-person household, they fall behind fast. Then food sits, rots, and smells. Good worm care tips at the start are boring but they matter: use a generous amount of damp shredded cardboard or paper, add a modest amount of food, keep the bin in a consistently mild spot, and let the system settle before you treat it like a black hole for all your leftovers.
Overfeeding Is the Classic Rookie Move, and It Turns Quietly Gross
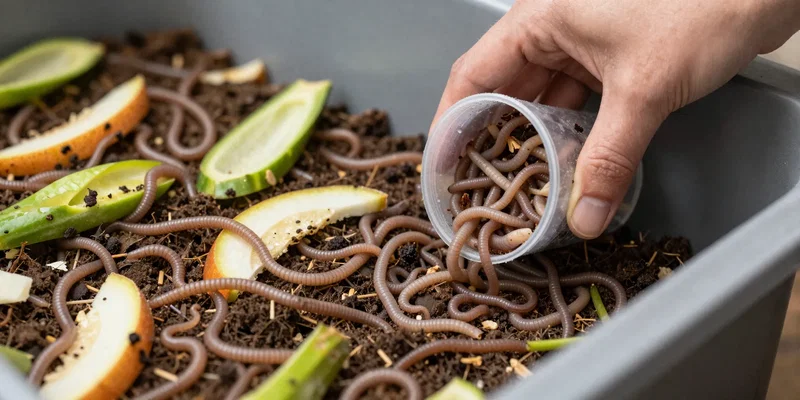
If there’s one mistake that deserves the top spot, it’s overfeeding. New worm keepers get excited, see a few apple cores disappear, and decide the bin can handle everything from the cutting board every single day. But worms do not eat fresh scraps at the speed most people imagine. They mainly consume the microbes breaking the food down. When you dump in more than that little ecosystem can process, the bin shifts from “living compost” to “rotting trash container.” That’s when odors, fruit flies, and soggy sludge show up.
Here’s the fix: feed less than feels necessary, especially in the first month. Bury small portions in different spots and wait until the previous feeding is mostly gone before adding more. Chop scraps smaller if you want faster breakdown. Freeze and thaw them first if you like, but don’t turn the bin into soup. This is one of those worm care tips that saves beginners a lot of frustration. If your bin smells sour, looks slimy, or has untouched piles of food from last week, stop feeding for a bit and add dry bedding. Worm bins recover surprisingly well when you stop “helping” so much.
Bad Moisture and Bedding Levels Push Worms Into Survival Mode
Worms need moisture, but beginners often hear that and create a swamp. The bedding should feel like a wrung-out sponge, not a dripping mop. Too wet, and the air spaces collapse. Then the bin goes anaerobic, which is a polite way of saying it starts smelling foul and the worms get stressed. Too dry, and decomposition slows to a crawl while the worms retreat, stop breeding well, and may try to escape. Plenty of indoor compost problems come down to this one balance being off.
Bedding is not filler. It is half the system. Shredded cardboard, plain paper, egg cartons, and dry leaves if you have them help regulate moisture, keep food separated, and give worms a safe place to hang out. New keepers often add a lot of food and barely any carbon-rich bedding because scraps feel like the “real” compost ingredient. Actually, the bedding is what keeps the whole thing stable. Every time you feed, add some dry or slightly damp bedding too. If the bin is wet, add more than you think you need and fluff gently. If it’s dry, mist lightly or mix in bedding that’s been moistened first. Most apartment worm bin errors are easier to fix when there’s enough clean, fibrous bedding in the bin.
The Food Itself Can Be the Problem, Not Just the Amount
Not all scraps behave the same way indoors. A beginner can avoid overfeeding and still run into trouble by adding the wrong stuff. Huge chunks of melon rind, greasy leftovers, meat, dairy, heavily salted foods, and oily sauces are common apartment worm bin errors because they break down in messy, smelly ways that attract pests. Even perfectly acceptable scraps can cause trouble if they go in as dense, wet clumps with no bedding around them. A whole avocado half or a packed wad of lettuce leaves can sit there fermenting long before the worms make progress.
Some advice online gets weirdly dramatic about onions, garlic, and citrus, as if a single orange peel will end civilization. The real issue is quantity and balance. Small amounts are usually fine in a healthy, well-bedded bin. Dumping in half a bag of acidic citrus peels or a pile of onion skins at once is another story. The same goes for coffee grounds: useful, but not by the bucket unless you’re also balancing moisture and texture. Crush eggshells if you use them; they help with grit and can moderate conditions a bit, but they are not magic. Think variety, small portions, and physical texture. If the food matts together, goes sour fast, or stays recognizable for too long, change the mix and make it easier for the bin to breathe.
Ignoring Temperature, Light, and Disturbance Keeps Worms Stressed
Apartment dwellers often focus so hard on the bin contents that they forget the surrounding environment. Worms like stable, mild conditions. Put the bin in direct sun, next to a heater, on a freezing balcony, or in a spot that gets bumped and opened all day, and they stay stressed. That stress shows up as slow processing, attempts to crawl up the sides, poor reproduction, and a bin that never quite settles down. Beginner vermicomposting mistakes are often quiet like that. Nothing dramatic happens at first. The system just never gets comfortable enough to work well.
Leave the worms alone more than you think. New keepers love to dig through the bin every day to “check on them,” which is a bit like waking somebody up every hour to ask if they’re sleeping okay. Light handling is fine, but constant rummaging breaks up zones where worms are feeding and breeding. Keep the bin in a spot with steady indoor temperatures, crack the lid or ensure airflow if your setup allows it, and only inspect deeply when there’s a reason. If worms are gathering on the lid or trying to escape, don’t panic and assume they’re dramatic. Usually they’re reacting to a condition problem: too wet, too hot, too acidic, or too much unfinished food below.
Waiting Too Long to Correct Smells, Pests, and Packed Castings Is How Bins Slide Off Track
A healthy worm bin smells earthy, not nasty. If yours smells sour, rotten, or like a forgotten garbage bag, that’s not a minor quirk. It’s feedback. The same goes for clouds of fruit flies, mites taking over wet food pockets, or bedding that has compacted into dense black muck with no fluff left. Beginners often wait too long because they hope the worms will “balance it out.” Sometimes they can. More often, the bin keeps drifting until recovery becomes harder than it needed to be.
One of the most overlooked worm care tips is harvesting or resetting the bin before it turns into a solid block of castings. Finished castings are great, but when the whole bin becomes dense and overprocessed, airflow drops and moisture problems get worse. Refresh it with new bedding, feed on one side, and let the worms migrate if you’re separating castings. Keep the surface covered with dry bedding to discourage flies. If something smells bad, remove excess food, loosen the material, and add carbon-rich bedding immediately. You do not need fancy gear or miracle additives. You need attention at the right moment. Most indoor compost problems don’t start as disasters. They start as small imbalances that get ignored because the bin still looks “mostly fine.”